|


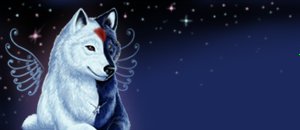
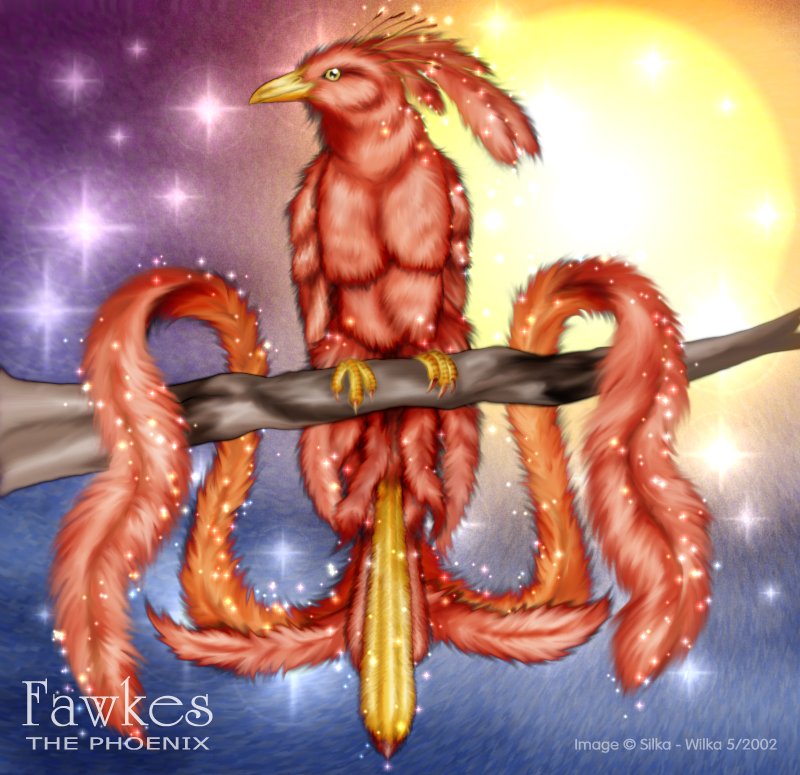
In this little tutorial I will try to explain how I colour images using my "furry" colouring method in Adobe Photoshop. Let's take this Phoenix picture as an example; |
|
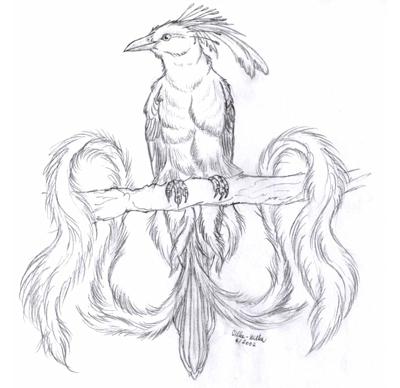
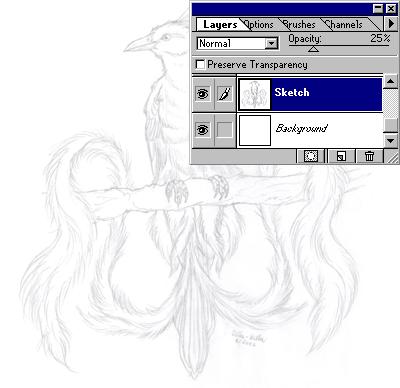
First, take the scanned sketch. I used to draw a simple lightly-coloured sketch by the mouse before I got a scanner, but it is much easier for me to use the scanned pictures now.
|
|
|
Put white background layer under the layer with sketched image. Then set transparency of the sketch layer to 20-40%. This step makes the sketch brighter and you can better retrace it in the following steps.
|
|
|
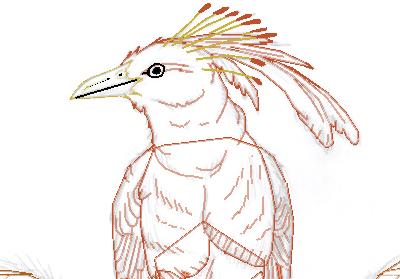
Trace the sketch using the Line Tool (Make sure it is NOT anti-aliased). In the newer versions of AP than 4.0 (which I use), the Line Tool is drawn as a shape. You must set the "Create filled region" on and then you can set the Anti-aliasing off.
I mostly use the line width 2, but you can set it thicker or thinner as you want. Use the darker colours than the ones you will be filling the image with. BUT - what the MOST IMPORTANT thing on this "furry" colouring method is, it is to put every part of the character's body into it's own layer so no two parts are overlapping! Follow the next image to see how the layers are arranged.
|
|
|
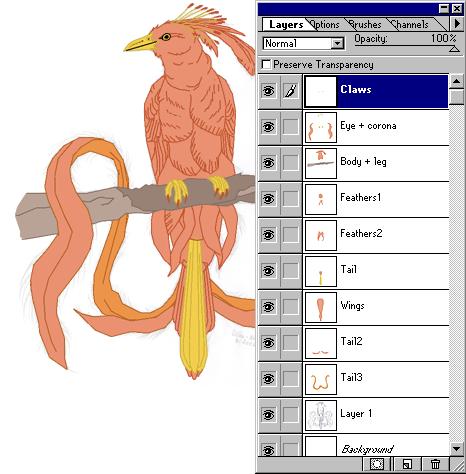
Well, this image is coloured (filled in), but you still have just the uncoloured lines when you are tracing the character's body parts into different layers. I just haven't saved the image in this position to show it up here ^_^*
That's right, this image is very complicated and it has many separated layers. The other characters like wolves and lions that I draw are not that complicated, they have just a few layers, four or five. But never mind, I will try to describe this layer-thing more. I usually start with tracing the eyes and mouth (beak in this case ^_^) to one layer, and then I continue with the head in another layer, and the body in a next one. When the main parts of the character are traced, then I decide where to put the other ones like legs and feathers in this case. Of course I can use separated layer to EVERY part, but it slows down the computer because it needs a lot of memory. So, for example, I put the leg into the same layer as the head, because they are not OVELAPPED.
Look at the picture below. Here you can see how the character's body parts are arranged into the layers. I made the image clickable, so you can click on any of the layers to see them more detailed. If you are advanced enough in using layers and you understand it well, continue to the next step.
|
|
|
When you finish tracing the image into the layers, you can colour the whole character. Use Paint Bucket tool to fill every part of the image with the proper colours (Then the picture will look like the one above). Using the Burn and Dodge tool you can shadow the picture. Paint the shadows exactly on the colours to each layer, do not create new layer for shadowing. [Umm, well, this picture is not shadowed well, but I am not that good at shadowing... I just put the shadows wherever I can, eeergh. You can make better shadowing effect when you follow the fictional light-bulb somewhere ^_^ I tried it on some images like this leopard character (copyrighted to it's creator!).]
|
|
|
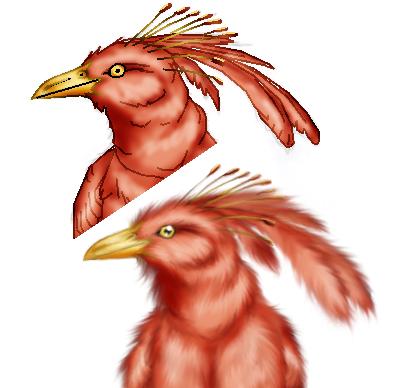
Now you have the horribly looking image. Delete the sketch layer (or make it invisible) to see better your next steps. All you have to do now is to smooth the whole image using the Smudge tool. Move your mouse quickly up and down, right and left. This is why you needed to put all parts to separated layers - now you can draw the fur accros the lower layers without messing them up! Make sure the furs (or the feathers) are all destinated to the direction as they grow or as the wind blows. Otherwise your character would be tangled ^_^
The more detailed fur you want, the smaller brush you need to use. Yes, this method demands a lot of patience, but put your time into your work and it will look great.
|
|
|
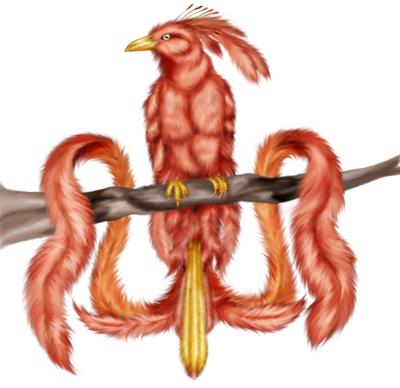
Now, this image is looking much better ;-) You can finish the final effects like the eye-shining, or jewelry-shining (if the character has some).
|
|
|
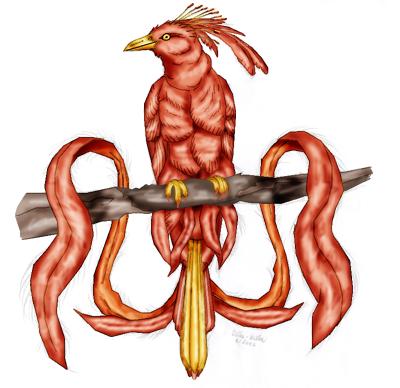
Add some good-looking background, effects, your sign, and the picture is finished ^_^ (Click on the image below to see it's original size)
|

|
 |
 |
All of the images and graphics have been made by me (Akela Taka). Please do not copy, use or redistribute them without my permission. Copyright © 2002 - 2010 Akela Taka. All copyrighted characters belong to their respective owners. |
|